
The power to just accept on-line funds simplifies the method of getting paid on your work. Invoicing and funds with The Hub offers you an built-in person interface for issuing invoices and managing your funds.
You should utilize it to avoid wasting worthwhile time by not having to depend on dozens of platforms or manually growing your personal instruments to handle tasks.
After a number of steps to arrange a GoDaddy Service provider account, you’ll be able to entry the invoicing and funds instruments from the unified interface in The Hub. There isn’t a value to create or ship invoices and there’s a easy, industry-low transaction price to course of on-line funds.
By making the most of invoicing and funds, you’ll be able to set up your online business as extra skilled and reliable, all whereas getting paid quicker.
Sending invoices with The Hub
There are two strategies for sending invoices to your prospects. The primary is to create the bill utilizing The Hub’s instrument, after which have it robotically emailed to the shopper. The second is to create the bill in The Hub and manually ship it to the shopper.
To ship an bill robotically
- Log in to The Hub.
- Go to the left-hand column, and choose Invoicing
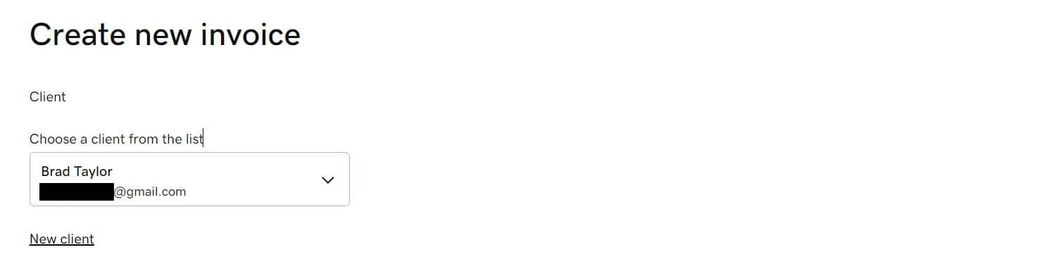
- Click on New Bill. If in case you have created any prior invoices, you’ll must click on the + icon adopted by New Bill.
- Select a Consumer out of your present record. You too can add a New Consumer straight from the web page.
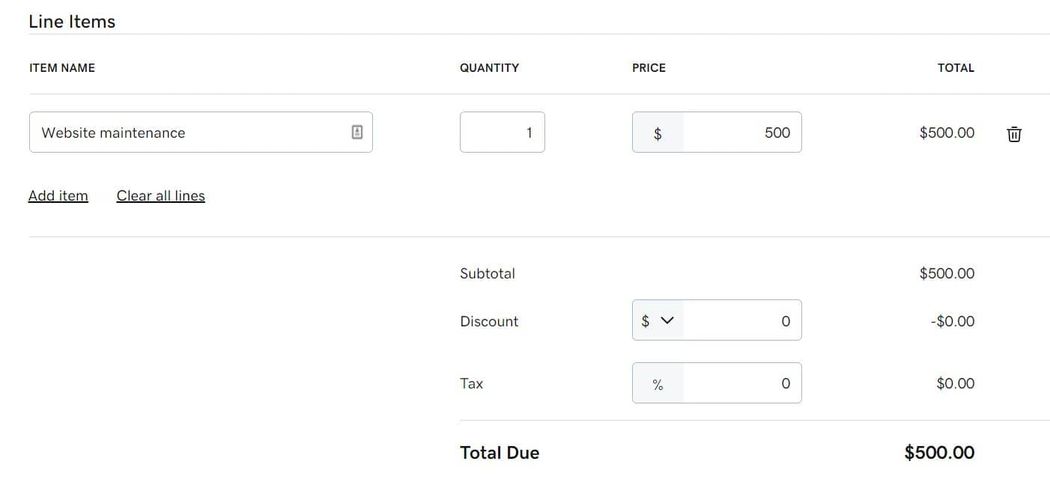
- Add the Line Gadgets together with the Title, Amount, and Worth for every service. If you wish to apply a Low cost or Tax, you are able to do so within the fields beneath.
- Subsequent, you could enter the cost particulars. The Repeat choice allows you to arrange recurring invoices. Choose, By no means if it’s a one-time bill. Select the Ship date and the Due date.
- Lastly, you’ll be able to add an Bill ID, Abstract, and non-compulsory Buyer message. As soon as, full, click on Evaluation and Ship.

To set a recurring bill
- Log in to The Hub.
- Go to the left-hand column, and choose Invoicing.
- Click on New Bill. If in case you have created any prior invoices, you’ll must click on the + icon adopted by New Bill.
- Select a shopper out of your present record or create a brand new shopper.
- Add the road objects together with the title, amount, and value for every service.
- Set the Repeat choice to the interval you wish to use between invoices. There are default choices for weekly, bi-weekly, and month-to-month. Plus, you need to use a Customized interval.
- Choose the Begin Date and the Finish Date. When you chosen Customized within the prior step, you’ll then must specify the period of time between invoices.
- Lastly, you’ll be able to add an Bill ID, Abstract, and non-compulsory Buyer message. As soon as, full, click on Evaluation and Ship.

To ship an bill manually
- Log in to The Hub.
- Go to the left-hand column, and choose Invoicing.
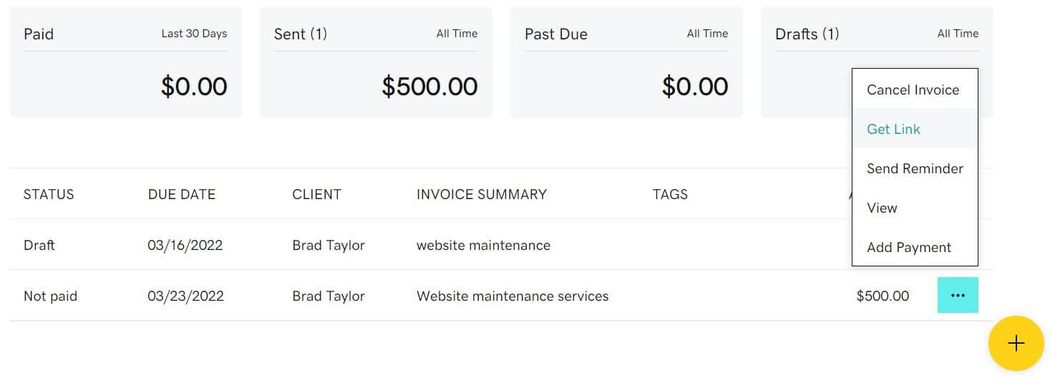
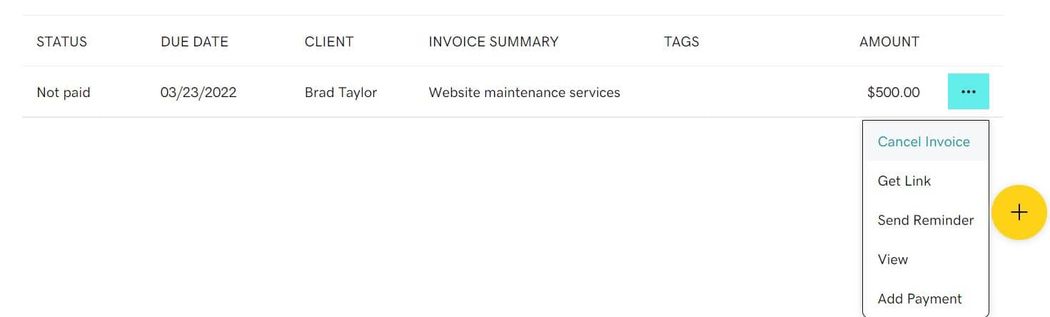
- Discover the bill you wish to manually ship, after which from the three-dot menu, choose Get Hyperlink.
- You’ll see a small window seem within the higher proper nook with the bill URL. The hyperlink can even be copied to your clipboard.
- You possibly can then share the hyperlink with the shopper whether or not by e-mail or one other communication channel.
Managing invoices and funds with The Hub
The cost course of is supposed to be simple for purchasers. All they should do is click on a button within the e-mail or hyperlink to go to a GoDaddy Funds website to finish the cost.
Shoppers obtain automated reminders when invoices are three and 7 days previous the due date. You too can manually ship a reminder each earlier than and after the due date.
To ship a handbook reminder
- Log in to The Hub.
- Go to the left-hand column, and choose Invoicing.
- Discover the bill after which from the three-dot menu, choose Ship Reminder. It will open a window the place you’ll be able to enter an non-compulsory message for the shopper.
- Enter your message and click on Ship.

To cancel an bill
- Log in to The Hub.
- Go to the left-hand column, and choose Invoicing.
- Discover the bill after which from the three-dot menu, choose Cancel Bill
- Click on Verify.
Take away the trouble from getting paid
Getting paid ought to be easy. With invoicing and funds in The Hub, repetitive admin work and a number of instruments are a factor of the previous. Spend your time rising your online business, not worrying about getting paid.